GraphQL是什么?GraphQL是一种既用于API的查询语言,也满足数据查询的运行时语言。GraphQL对你的API中的数据提供了一套易于理解的完整描述,使得客户端能够准确地获取它需要的数据,而且没有任何冗余,也让API更容易地随着时间推移而演进,还能用于构建强大的开发者工具。
GraphQL is a query language created by Facebook in 2012 which provides a common interface between the client and the server for data fetching and manipulations.
The client ask for various data from the GraphQL server via queries. The response format is described in the query and defined by the client instead of the server: they are called client-specified queries. The structure of the data is not hardcoded as in traditional REST APIs - this makes retrieving data from the server more efficient for the client.
一、场景分析
现有的数据业务场景一般是这样的,业务方提出需求,然后寻找开发资源,由后端提供数据,让前端实现各种不同的业务视图。这样的做法存在很多的重复劳动,如果能够将其中通用的内容抽取出来提供给各个业务方反复使用,必然能够节省宝贵的开发时间和开发人力。
前端的解决方案时将视图组件化,各个业务线既可以是组件的使用者,也可以是组件的生产者。那么问题来了,前端通过组件实现了跨业务的复用,后端接口如何相应地提高开发效率呢?
我们假设某个业务需要以下数据内容a:
1 | { |
很明显这不是一个JSON,但是我们仍然可以看懂它表示的是查询id为3500401用户的id、name和isViewerFriend信息。用户信息对于各个业务都是通用的,假设另外一个业务需要这样的用户信息b:
1 | { |
对比一下,我们发现只是少了两个字段,多了一个字段而已。如果要实现我们的目标,即复用同一个接口来支持这两种业务的话,会有以下几种做法:
用同一个接口,这个接口提供了所有数据。这样做的好处是实现起来简单,但缺点是对业务做判断的逻辑会增多,而且对于业务来说,响应内容中有些数据根本用不到
使用参数来区分不同的业务方并返回相应的数据。好处仍然是实现简单,虽然不会有用不到的数据返回,但是仍然需要增加业务逻辑判断,会造成以后维护的困难。
此外,这样还会造成不同业务之间的强依赖,每次发布都需要各个业务线一起测试和回归。不重用接口则没法提高开发效率,重用接口则会有这些问题。
二、GraphQL解决方案
我们知道,用户信息对应的数据模型是固定的,每次请求其实是对这些数据做了过滤和筛选。对应到数据库操作,就是数据的查询操作。如果客户端也能够像“查询”一样发送请求,那不就可以从后端接口这个大的“大数据库”去过滤筛选业务需要的数据了吗?
GraphQL就是基于这样的思想来设计的。上面提到的(a)和(b)类型的数据结构就是GraphQL的查询内容。使用上面的查询,GraphQL服务器会分别返回如下响应内容。
a查询对应的响应
1 | { |
b查询对应的响应
1 | { |
只需要改变查询内容,前端就能定制服务器返回的响应内容,这就是GraphQL的客户端制定查询(Client Specified Queries)。
三、使用NodeJS实现GraphQL服务器
我们先按照官方文档搭建一个GraphQL服务器
1 | mkdir graphql-intro && cd ./graphql-intro |
index.js的内容如下:
1 | require('babel-register'); |
server.js的内容如下:
1 | const express = require('express'); |
然后执行代码
1 | nodemon index.js |
测试是否有效
1 | curl -XPOST http://localhost:3000/graphql // => 'Hello' |
接着编写GraphQL Schema(Schema是GraphQL请求的入口,用户的GraphQL请求会对应到具体的Schema),首先回忆一下GraphQL请求是这样的
1 | query getHightScore { score } |
上面的请求是获取getHightScore的score值。也可以加上查询条件,例如
1 | query getHightScore(limit: 10) { score } |
这样的请求格式就是GraphQL中的schema。通过schema可以定义服务器的响应内容。
接下来我们在项目中使用graphql
1 | npm install graphql --save |
graphql的npm包会负责组装服务器schema并处理GraphQL请求。
1. 创建schema
1 | type nul> ./schema.js |
1 | import { |
这段代码创建了一个GraphQL Schema实例。这个schema的顶级查询对象会返回一个RootQueryType对象,这个RootQueryType对象有一个整数类型的count域。GraphQL除了支持整数(Interger),还支持字符串(String)、列表(List)等多种类型的数据。
2. 连接schema
下面将GraphQL Schema和服务器连接起来,我们需要修改server.js为如下所示
1 | import express from 'express'; |
验证下效果
1 | curl -v -XPOST -H "Content-Type:application/graphql" -d "query RootQueryType { count }" http://localhost:3000/graphql |
结果如下图所示
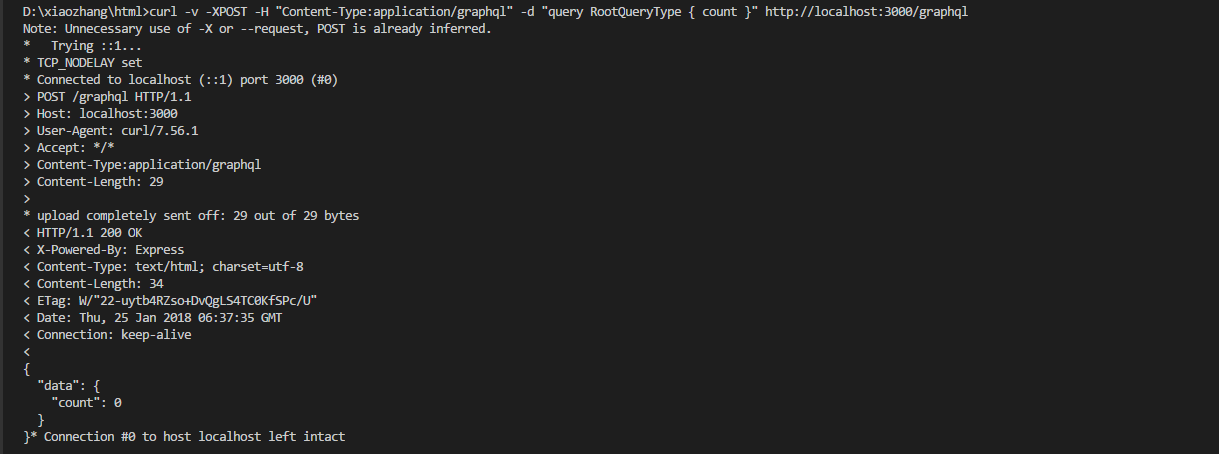
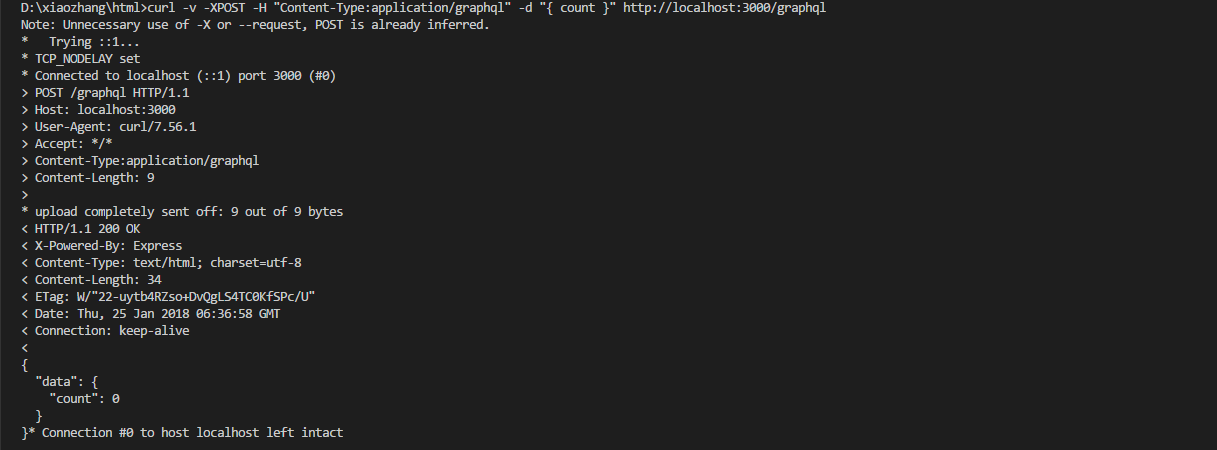
GraphQL查询还可以省略掉queryRootQueryType前缀
1 | curl -v -XPOST -H "Content-Type:application/graphql" -d "{ count }" http://localhost:3000/graphql |
3. 检查服务器
GraphQL最让人感兴趣的是可以编写GraphQL查询来让GraphQL服务器告诉我们它支持哪些查询,即官方文档提到的自检性(introspection)。
例如:
1 | curl -XPOST -H "Content-Type:application/graphql" -d "{ __schema { queryType { name, fields { name, description } } } }" http://localhost:3000/graphql |
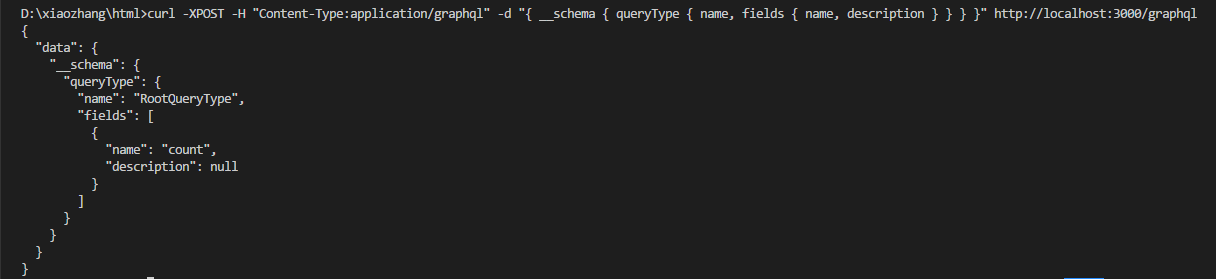
而我们实际的GraphQL查询请求内容为
1 | { |
基本上每个GraphQL根域都会自动加上一个__schema域,这个域有一个子域叫queryType。我们可以通过查询这些域来了解GraphQL服务器支持哪些查询。我们可以修改schema.js来为count域加上description:
1 | let schema = new GraphQLSchema({ |
验证一下
1 | curl -XPOST -H "Content-Type:application/graphql" -d "{ __schema { queryType { name, fields { name, description } } } }" http://localhost:3000/graphql |

4. 变异(mutation)
GraphQL中将对数据的修改操作称为mutation,在GraphQL Schema中按照如下形式来定义一个mutation:
1 | let schema = new GraphQLSchema({ |
mutation查询和普通查询请求(query)的重要区别在于mutation操作是序列化执行的。例如GraphQL规范中给出的示例,服务器一定会序列化下面的mutation请求:
1 | { |
请求结束时theNumber的值会是2。下面为我们的服务器添加一个mutation查询,修改schema.js为如下所示:
1 | import { |
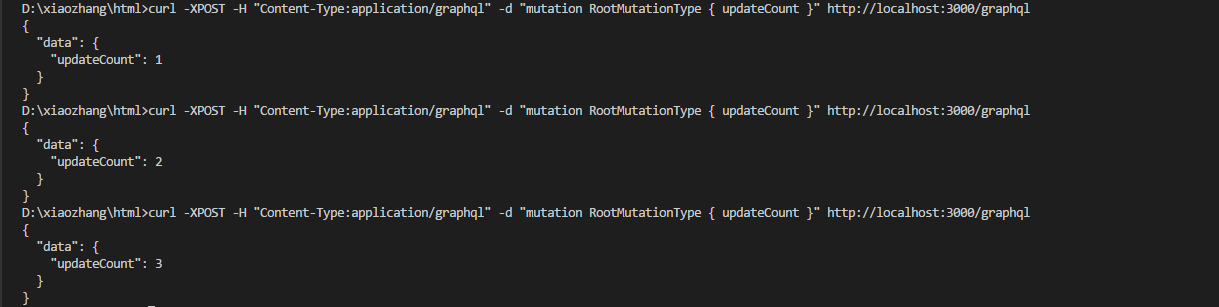
验证一下
1 | curl -XPOST -H "Content-Type:application/graphql" -d "mutation RootMutationType { updateCount }" http://localhost:3000/graphql |
四、业务场景模拟
搭建好GraphQL服务器后,我们来模拟下业务场景的实际需求,对于电商平台来说,最常用的就是商品信息,假设目前的商品数据模型可以用下面的GraphQLObject来表示
1 | var ItemType = new GraphQLObjectType({ |
查询商品的schema如下所示
1 | var ItemSchema = new GraphQLSchema({ |
通过如下query可以查询id为12345的商品信息
1 | query ItemQuery(id: 12345) { |
商品详情页展示时需要加上优惠价格信息,我们可以修改ItemType,为它加上一个promotion字段
1 | var ItemType = new GraphQLObjectType({ |
商品详情页的查询为
1 | query ItemQuery(id: 12345) { |
ItemSchema无需修改,只要在ItemService的返回结果中加上promotion就可以了。这样接口的修改对于原有业务是透明的,而新的业务也能基于已有的代码快速开发和迭代。
再假设有一个新的页面,只需要用到宝贝的图片信息,业务方可以使用下面的查询
1 | query ItemQuery(id: 12345) { |
服务器代码不用做任何修改。
至此我们已经实现了一个GraphQL基础服务器。在实际业务中数据模型肯定会更加复杂,而GraphQL也提供了强大的类型系统(Type System)让我们能够轻松地描述各种数据类型,它提供的抽象层能够为依赖同一套数据模型的不同业务方提供灵活的数据支持。